Home

Showing posts with label garden. Show all posts

Friday, August 4, 2017

Backyard Project: Sorting, Recycling, Reusing - the Waste Materials


It is time to sort through the construction waste materials.
Josh took all larger pieces of plywood to use on his next job site. It is useful for making the form work. He didn't have to buy much more plywood for the form work because he reused a lot from the construction of the Green Shed.
All of the smaller pieces of plywood and all painted wood was piled up to be taken away in the garbage trailer. It is all the wood with glues and chemicals that are not safe to burn.

The garbage trailer also took away plastics used to wrap supplies, hold glue and cover curing cement.
I presume it will go to the local landfill where the trailer will be weighted and we will be charged according to that weight.

The left over blasted rock in the background will be used to edge paths.
I used some of the broken pavers as stepping stones in some of the garden beds but most of them, along with the waste concrete, was stacked under the Green Shed's Contemplation Room, there if we ever need it. Because of its weight, it would have cost a lot of money to dispose of in the landfill and there wasn't enough to warrant a dump truck taking it all the way to the quarry for recycling.

Taylor tackled the remaining waste wood pile. He and Josh had reused it so many times on the job the remaining pieces were just smallish off cuts.

I measured the sizes of our 2 fireplaces to find out the maximum length of wood each to take. Taylor then used these 2 numbers to make the best cuts in the remaining wood. Here he is making 2 stacks with longer pieces on the right and shorter pieces on the left.

It was pointed out to me we would be paying for Taylor's time to cut this wood. I pointed out how much it costs to have a pickup truck load of firewood delivered. Also, I was not comfortable with paying for this wood to go into a landfill when we could use it.

Josh used the forks attachment on the Bobcat to move the bundle of long pieces up to the patio area and put it as close as he could to where it was needed.

Ron then moved each piece and re stacked it beside the chimney. Notice the air holes he has left to help keep the wood dry.

The last couple of trees that fell during the winter storms have been cut up, some of it in suitable lengths for firewood. This called 'hucking' the log. These lengths are left to dry out for a bit or not (there are different schools of thought on this) then Ron splits them. He dumps them behind the propagation table and it is my job to crawl under and stack the wood. It will be protected behind the glass and the bottom part will allow air to circulate.
Locating the firewood stack here is another function of the Propagation Room and it solves the previous problem of there being nowhere to stack firewood near where it was needed. The fireplace is inside the house to the left. 
Plus I love the look of stacked firewood as a design feature and for other reasons.

When a tree falls or needs to be cut down for safety reasons we now have a standard order for cutting it up. If it is still standing we ask to leave about 15 to 20 feet standing and hope it will become a wildlife tree. The tree above fell over and its root area will be left as is because the disturbed soil stimulates all sorts of soil organism and plant activity. 
Next the widest part of the trunk is hucked into lengths to later be split for firewood. The next section of about 15 feet is left lying on the ground as a nurse log to support new growth in the forest. The next part is cut into 5 inch rounds and I use these for making 'gardener's paths' to give access into the middle of the wider garden beds. Depending on the length of the tree there may be another section for firewood. The last part of the trunk I use the small sections as edges for garden beds. The branches are cut off and left insitu to protect young plants in the undergrowth eventually rotting down to feed the soil. 
When I explain what I want to the most obliging forester it reminds me of giving the butcher the order when cutting up a whole animal.

Ron is stacking the shorter lengths of construction waste firewood under the inside of the propagation table. I didn't want to be able to see it from the outside thinking it would not look very attractive but he has done such a neat job I think it looks lovely.
So that is the story about managing the waste materials from the Backyard Project construction site.


Monday, July 31, 2017

Backyard Project: Soil Building, Shelf Building, Glass Installation

Now that Josh has moved in place the big rocks that define one boundary of the garden bed, I have started soil building. I am using the lasagne method of laying down a thick cardboard base, soaking it well then adding layers of 'green' and 'brown'.

But first I dug out all of the rocks and stones in the garden bed area. All of these came out of that one small bed.

This bed is west of the walk way to the pergola. I'm not sure what I will plant here but I don't need to do the research just yet because the soil building will take a while.
Meanwhile, Josh has painted the doors for the Garden Sheds. I like the clever way he has held the doors while painting them.

AND he has started the footings for the shelving in the sheds.

Whoopee, the Excalabor guys are back.

The sheets of glass were carried on the side of the truck with little cork spacers to stop the panes from touching and to absorb the travel vibration.


This safety glass has been cut to size then all of the edges ground smooth and rounded.

It took quite a while for all of the stickers to be taken off, the cork squares to be pulled off then all of it polished spotless before being installed.

Meanwhile, back at the Garden Shed site, Josh has set up several workstations for constructing shelving.

Taylor has come back. He has carried lots of loads of coarse gravel up to the site and is now levelling the base frames for the cabinets.

The first lot of shelves have been built. These are to hold small tools where they will be kept dry. This is the Power Tool Shed.

In the same location in the other shed, the Garden Shed, Josh has built a frame to hold gardening tools upright. 
Inside the 2 dry sheds, we are leaving all of the plywood unfinished so there is no maintenance in the future. It will take on the patina of a place well used.

Monday, July 24, 2017

Backyard Project: Garden Sheds, Garden Beds and Rock Edges

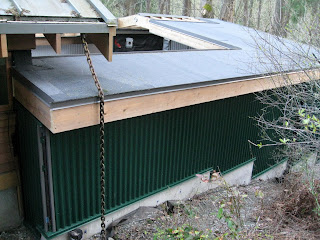
The cladding on the 2 sheds is coming along. This is the south wall.

Interior north wall

Interior south wall where my potting counter will be built.

West wall with its 2 windows. Glimpses of this wall can be seen from the road.

Outside north wall. The drainage chain will be replaced with a downspout.

I am in my studio cutting up lengths of garden cloth...

...while Taylor is carrying buckets of drainage gravel up from the back driveway to the new Lower Patio bed area  (used to be the hot tub).

Taylor is placing the gravel on top of the drainage filter cloth...

...then wrapping the cloth around the gravel making a drainage sock. The filter fabric keeps soil out of the gravel so it will continue to drain water away.

As soon as Taylor had finished I added a thick layer of recycled paper then a layer of wood as the beginning of the soil making process. I am looking forward to planting these beds but I will have to hold back until the soil organisms have done their job.

Taylor then moved on to continue making the rock edge of the new garden bed. Didn't he make a nice curve using the blasted rock? I think he has discovered another talent - stone masonry.

I gave him my shortest path stick to use as a guide when placing the rocks.
Taylor was able to work with me for the morning and we got so much done.
I like it when several areas of the Backyard Project are being worked on at the same time. It feels productive.

Wednesday, July 19, 2017

Garden Update: When Life Started to Stir From the Soil

Back towards the end of March life started to stir and appear from the soil.
First were the spring bulbs in the Cut Flower bed.

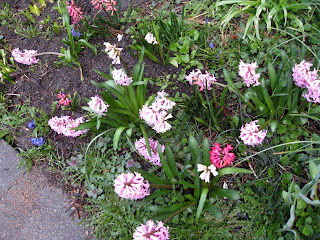
The first to show was the hyacinths with lots of iris leaf growth.

The meadow plants started to put on new growth and the comfrey (left) appeared after being dug under when the irrigation system was put in.

I got the eagerly anticipated call from Verna at Fruit Trees and More that my order was in. I went straight away and picked up an Italian plum and many different shrubs and berry bushes.
I also did a thorough search of one of my favourite nurseries Le Coteau Nursery and found many of the trees and shrubs on my list.

At this stage of planting the beds, I am making the big decision about which tree will anchor the ecosystem in each bed. Next, I look for the compatible shrub layer. However, I was sidetracked by the beautiful condition of these hostas at Le Conteau Nursery and bought a collection for the new bed between the cedar fence and the hugelkultur beds. They settled in straight away and put on new growth within a few weeks.

The locals thought the Hostas looked delicious too but nibbled only a few of the lower leaves.

I had said to Sammy I wanted to plant native Dogwood shrubs. One day he brought around some sticks and pushed them into the ground. Already their lovely red stems are a feature in the bed.
While continuing to build up and protect the soil with a mulch layer, I was focused more on planting while the rains continued.


Monday, July 17, 2017

Backyard Project: Moving Rocks Between a New Garden Bed and a Path

Josh is at work in the small Bobcat carrying a large rock in the bucket. This rock originated from the other side of the Bobcat in the now pergola area when a much larger rock was blasted and broken up.

I am directing which rock I wanted to be placed where while trying to stay well back from the Cat.

I have 3 sticks, each a different length, to mark out 3 different widths of paths. This stick is the longest and marks paths the lawn tractor and trailer will travel along.

I mark out the edges of paths with bright orange yarn held in place with small rocks. Josh can't see this yarn which is why I have the job of directing him. We should have gone over some standard hand signals before we started the job but somehow we communicated...

...and Josh was able to place the rocks to my satisfaction.

The new line of rocks viewed from the east side. They mark the curve of the path coming in from the gate and are the boundary of a bonus garden that I have already started to develop. With these end-rocks in place, I can continue layering green and brown materials to make soil and continue defining the boundary between the garden path and the garden bed with smaller blasted rocks.

Josh next moved over to the other side of the pergola to place a few rock to create a balance with the line of bigger rocks. This image shows how tight a space Josh had to work in. He did very well not bumping the pergola posts.
Another task is completed.