Home

Monday, July 24, 2017

Backyard Project: Garden Sheds, Garden Beds and Rock Edges

The cladding on the 2 sheds is coming along. This is the south wall.

Interior north wall

Interior south wall where my potting counter will be built.

West wall with its 2 windows. Glimpses of this wall can be seen from the road.

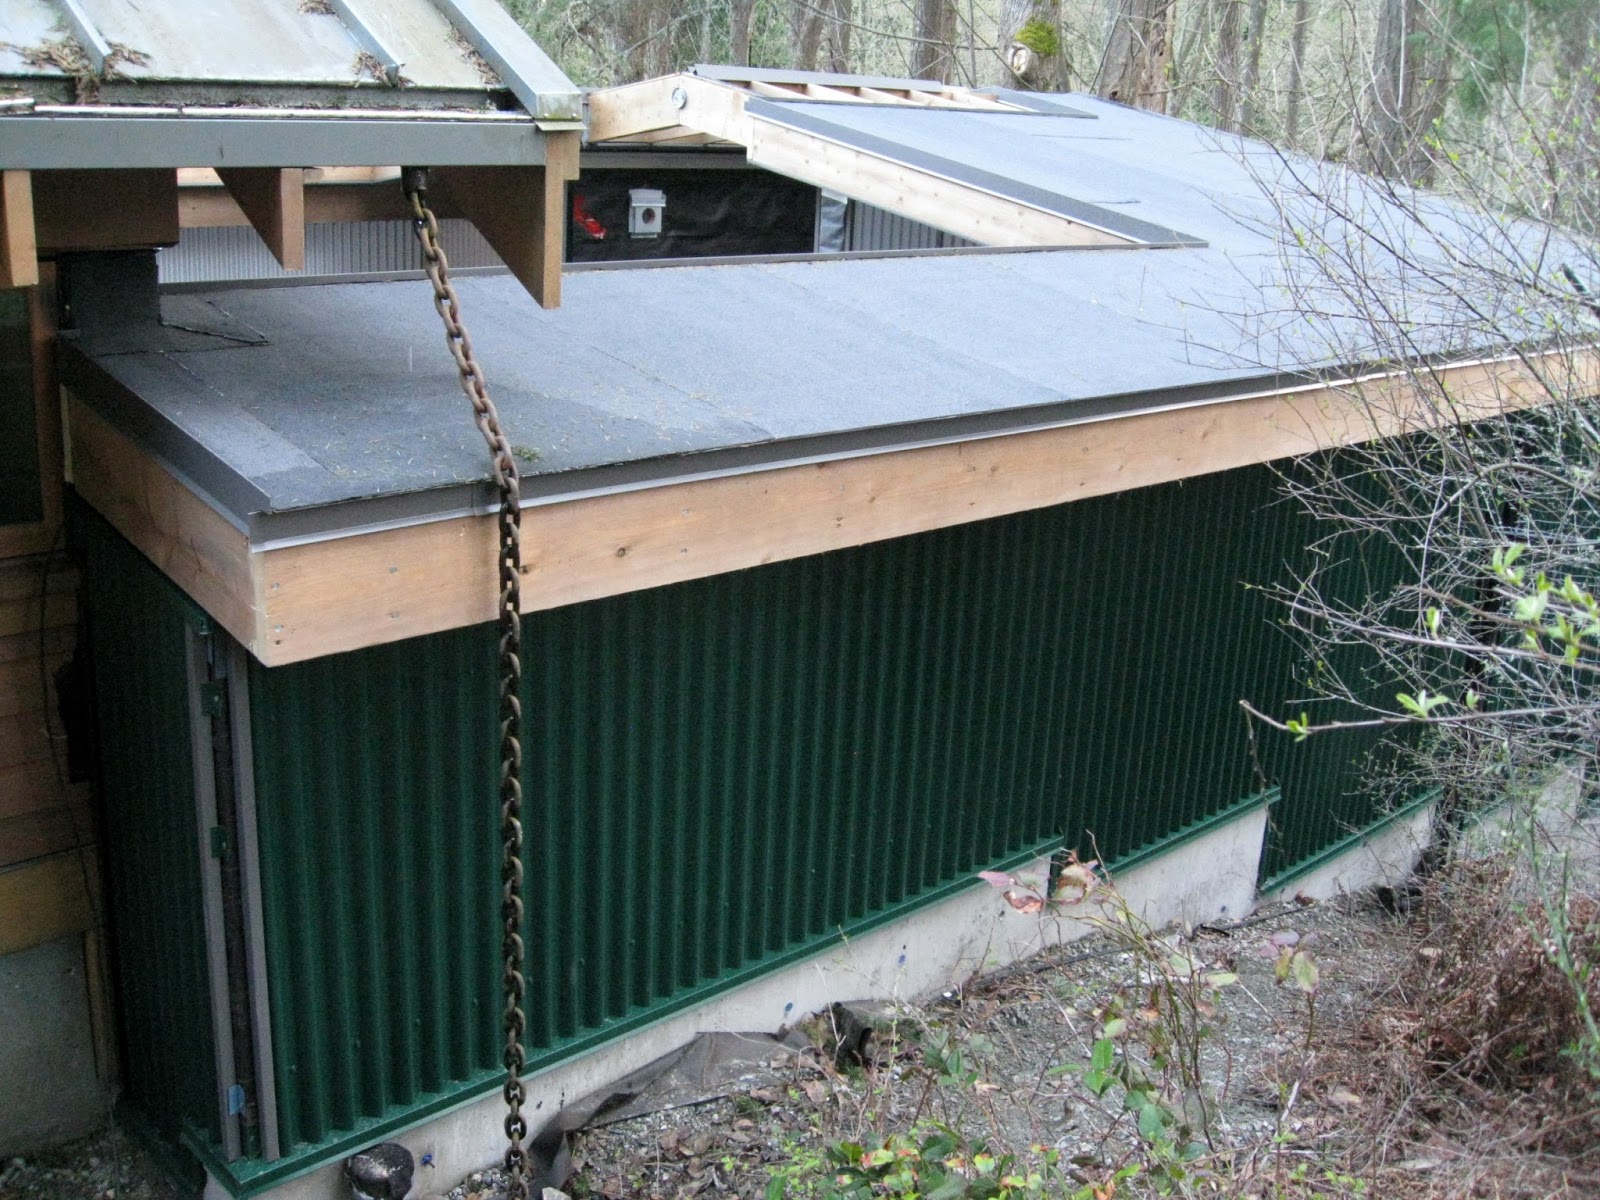
Outside north wall. The drainage chain will be replaced with a downspout.

I am in my studio cutting up lengths of garden cloth...

...while Taylor is carrying buckets of drainage gravel up from the back driveway to the new Lower Patio bed area  (used to be the hot tub).

Taylor is placing the gravel on top of the drainage filter cloth...

...then wrapping the cloth around the gravel making a drainage sock. The filter fabric keeps soil out of the gravel so it will continue to drain water away.

As soon as Taylor had finished I added a thick layer of recycled paper then a layer of wood as the beginning of the soil making process. I am looking forward to planting these beds but I will have to hold back until the soil organisms have done their job.

Taylor then moved on to continue making the rock edge of the new garden bed. Didn't he make a nice curve using the blasted rock? I think he has discovered another talent - stone masonry.

I gave him my shortest path stick to use as a guide when placing the rocks.
Taylor was able to work with me for the morning and we got so much done.
I like it when several areas of the Backyard Project are being worked on at the same time. It feels productive.

Friday, July 21, 2017

Photo Shoot in the Green Shed by Tony Bounsall

Tony Bounsall - Tony Bounsall Photo Design came to the Green Shed for a photo shoot.
Tony has been photographing my work for years because he really knows how to capture textiles.
Here he is setting up to photograph Barbara McCaffrey's large work.

I thought this work would be a challenge because it is solid buttons that turn shiny under lights but Tony was up to it and produced a lovely image.

I pushed back all of the furniture to make a large space in front of the design wall.
I invited 3 other artists to also have their work photographed in the same session.
We were all applying for the juried exhibition 'Eco-Threads' and wanted our work to look the best.

I moved the furniture around in the studio again to be able to block some loooong knitting. I had to build up the lower cutting table to extend the flat surface to block on.

To block knitting I use wires to hold the edges out straight while the fabric is drying. Wool has memory and will hold this shape once it is dry.

I use a t-pins to hold the wires at the corners and at a few places along the edges.

I had made 2 bias knit scarves in kid mohair and hand dyed merino for birthday gifts. The birthdays were happening soon so I needed to get these finished and in the post.

Then it was back to continue working on the Synesthesia series.
The flexible studio space was put to the test this week and proved to work well.

Wednesday, July 19, 2017

Garden Update: When Life Started to Stir From the Soil

Back towards the end of March life started to stir and appear from the soil.
First were the spring bulbs in the Cut Flower bed.

The first to show was the hyacinths with lots of iris leaf growth.

The meadow plants started to put on new growth and the comfrey (left) appeared after being dug under when the irrigation system was put in.

I got the eagerly anticipated call from Verna at Fruit Trees and More that my order was in. I went straight away and picked up an Italian plum and many different shrubs and berry bushes.
I also did a thorough search of one of my favourite nurseries Le Coteau Nursery and found many of the trees and shrubs on my list.

At this stage of planting the beds, I am making the big decision about which tree will anchor the ecosystem in each bed. Next, I look for the compatible shrub layer. However, I was sidetracked by the beautiful condition of these hostas at Le Conteau Nursery and bought a collection for the new bed between the cedar fence and the hugelkultur beds. They settled in straight away and put on new growth within a few weeks.

The locals thought the Hostas looked delicious too but nibbled only a few of the lower leaves.

I had said to Sammy I wanted to plant native Dogwood shrubs. One day he brought around some sticks and pushed them into the ground. Already their lovely red stems are a feature in the bed.
While continuing to build up and protect the soil with a mulch layer, I was focused more on planting while the rains continued.


Monday, July 17, 2017

Backyard Project: Moving Rocks Between a New Garden Bed and a Path

Josh is at work in the small Bobcat carrying a large rock in the bucket. This rock originated from the other side of the Bobcat in the now pergola area when a much larger rock was blasted and broken up.

I am directing which rock I wanted to be placed where while trying to stay well back from the Cat.

I have 3 sticks, each a different length, to mark out 3 different widths of paths. This stick is the longest and marks paths the lawn tractor and trailer will travel along.

I mark out the edges of paths with bright orange yarn held in place with small rocks. Josh can't see this yarn which is why I have the job of directing him. We should have gone over some standard hand signals before we started the job but somehow we communicated...

...and Josh was able to place the rocks to my satisfaction.

The new line of rocks viewed from the east side. They mark the curve of the path coming in from the gate and are the boundary of a bonus garden that I have already started to develop. With these end-rocks in place, I can continue layering green and brown materials to make soil and continue defining the boundary between the garden path and the garden bed with smaller blasted rocks.

Josh next moved over to the other side of the pergola to place a few rock to create a balance with the line of bigger rocks. This image shows how tight a space Josh had to work in. He did very well not bumping the pergola posts.
Another task is completed.


Monday, July 3, 2017

Backyard Project: Problem Solving, Finding Solutions

Lower Patio - constructed on the old hot tub pad. 
A problem - the enclosed area doesn't drain after a rainfall.
When working on one-off projects so much of the time is spent problem-solving.

Hmmm... the water has nowhere to go. 

Hmmmm....there's a nice damp place.
Solution - drain holes.

A problem - The excavations for the 2 sheds has exposed more of the house foundations which now makes the stepped edge of the house siding look odd. Mike has relocated the main irrigation pipe along the side of the house and Josh has started to rebuild and patch-up the siding. He had to hunt around quite a few lumber suppliers to find wood to match our 14-year-old house.

Problem solved. Josh did an excellent job finding a pleasing solution and skillfully working with the wood to solve the problem. When the rest of the wall is washed and repainted the colours will match better. Well done Josh.

Problem - Finding a mesh for the upper propagation table shelf.
Perhaps the leftover screen material from the gate? No, there is not enough and it would be very expensive to buy another sheet when only a part of a sheet is needed.
When products are sold in standard sized sheets and one is working with non-standard shapes there is often extra expense and waste because more sheets are needed than get fully used.

Another possibility? A leftover piece from a roll of metal mesh used to put inside a concrete form had the right price and size. Problem - it was already beginning to rust and I would accelerate the process when watering the plants sitting on it.
Also, it was a bit too springy and bouncy. The small pot plants would fall over whenever I placed a big pot beside it.

Solution? Leftover shelves from a shelving unit in the garage. It is a heavy gauge steel that can take the weight and Josh could work out a solution for securing it. Problem - I have other plans for those shelves. With now having sheds to put stuff in we are going to reorganise the garage and I plan to put the shelves on the shelving unit where they belong.

Solution. Ron and I visited a metal warehouse - a most interesting place. They have so many different kinds of metal sheets. We found this galvanised extruded (?) metal screen. It won't rust and is flat so the pot plants won't tip over. Problem solved.

Josh had the right tool to cut the sheet to size and he found a solution for securing it in place.
That was a problem that took a number of weeks to solve but we did come up with a successful solution.


Wednesday, June 28, 2017

Back yard Project: Eagerly Anticipated Shed Cladding Begins


It was a big day when the cladding crew arrived. It was the same crew who worked on the studio and did such an excellent job.
The first stage of the job is the most time consuming and detailed.

Nortek Exteriors is the great company we have worked with.

All of the edge pieces need to be measured, cut, shaped and secured in place. 

The design of the 2 sheds has many corners to test the skill level of the crew but they have proven they are up to the job.

Every power outlet needs its own little box constructed around it.
Sheet metal workers are trained to cut, shape and attach metal in a wide variety of applications including cladding aeroplanes and making cooling and heating ducting systems. It is most interesting to watch them at work with their wide variety of tools - hand and electrical.

The first of many corners is clad.


On to cutting the steel sheets to fit. 
Sheet metal workers need to have strong spatial skills including the ability to read lines making positive and negative shapes.

Whoo hoo! The first interior wall is clad - now all of the corners and edges have been covered.

My potting area has its interior cladding.
Meanwhile, Josh is working in wood tidying up the cladding of the house where more of the foundations have been exposed.